This free sound converter also include an Audio CD ripper to help you rip
Audio CD tracks so that you can store them in your PC or enjoy them on portable
devices.
Step 1. Select Ripping Device
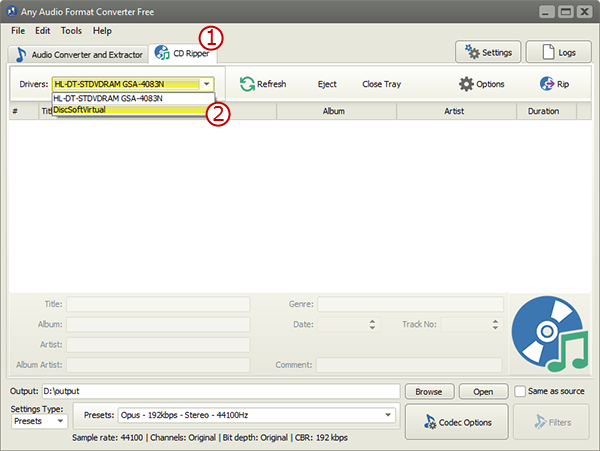
Insert an Audio CD to your disc drive and switch to "CD Ripper" tab (),
choose one ripping drive from the dropdown list of "Drivers" ().
If new devices are plugged in or the disc is changed, click "Refresh" to
update the device list.
Step 2. Specify Ripping Settings
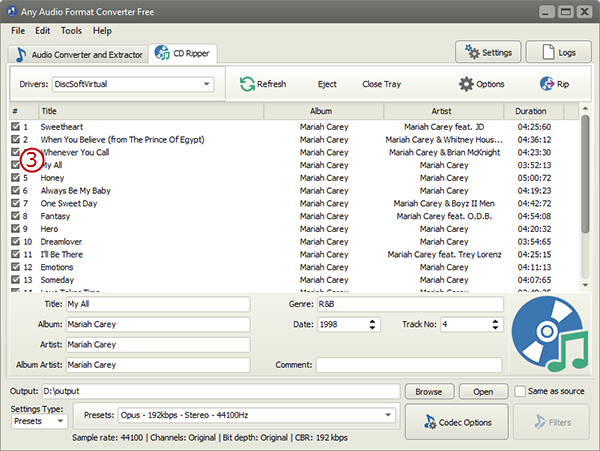
Once the CD is loaded, check ()
the tracks you want to rip. All the songs are checked by default along with
the detailed info including title, album, artist, duration, etc. listed.
If needed, uncheck the tracks you don't want to rip. To edit the info of
any specific song, you need to choose the track number in the menu of "Track
No." first and choose info like title, album, artist, album artist, genre,
date and comment to edit. For more advanced settings, click "Settings" and
in "CD Ripper" tab, you can choose to enable jitter detection, set paranoid
mode or download album cover. More importantly, you can change the user
email and freedb server to acquire info of different CD in the CDDB.
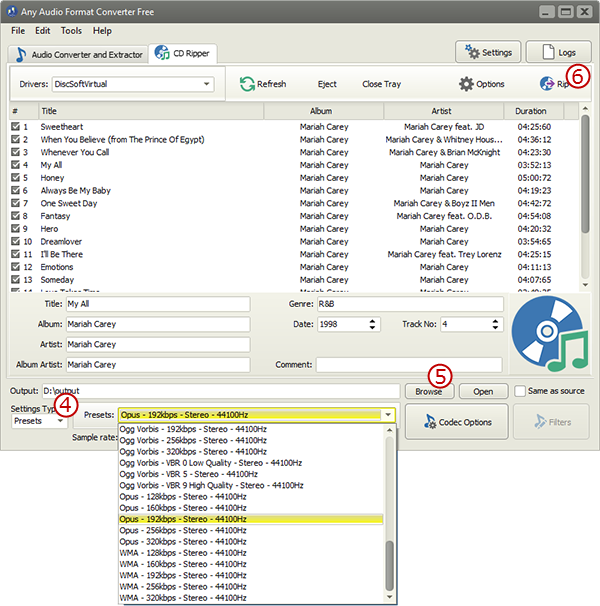
Step 3. Choose Output Folder & Quality Presets
In the menu of "Settings Type" (),
choose the presets and codecs you prefer. Click "Browse" ()
and choose an output folder for the ripped audio files. When all settings
are ready, click "Rip" ()
to start audio ripping. A progress bar, the time left and some detailed
info will be displayed for your reference. When the process is complete,
click "Eject" to eject the disc drive and "Close Tray" to close the disc
drive.